
This website will be shutting down at the end of May 2024.
Miss Anderson wishes you a fabulous summer vacation and an awesome 2024-2025 school year.


Avenza SmartPhone app
During my summer vacation, I explored much of the Eldorado National Forest. Navigating the nearby forest roads was easy after downloading the Avenza map application and purchasing the map for $4.99 from Avenza’s webpage https://www.avenzamaps.com. The map, drawn up by the U.S. Department of Agriculture (Forest Service), often included information to sites not normally referenced on standard driving maps. I was curious about one such site marked “Cem.” Cell service was sporadic in this area, but the app worked offline, so I could follow my real-time progress, shown with a blue dot.
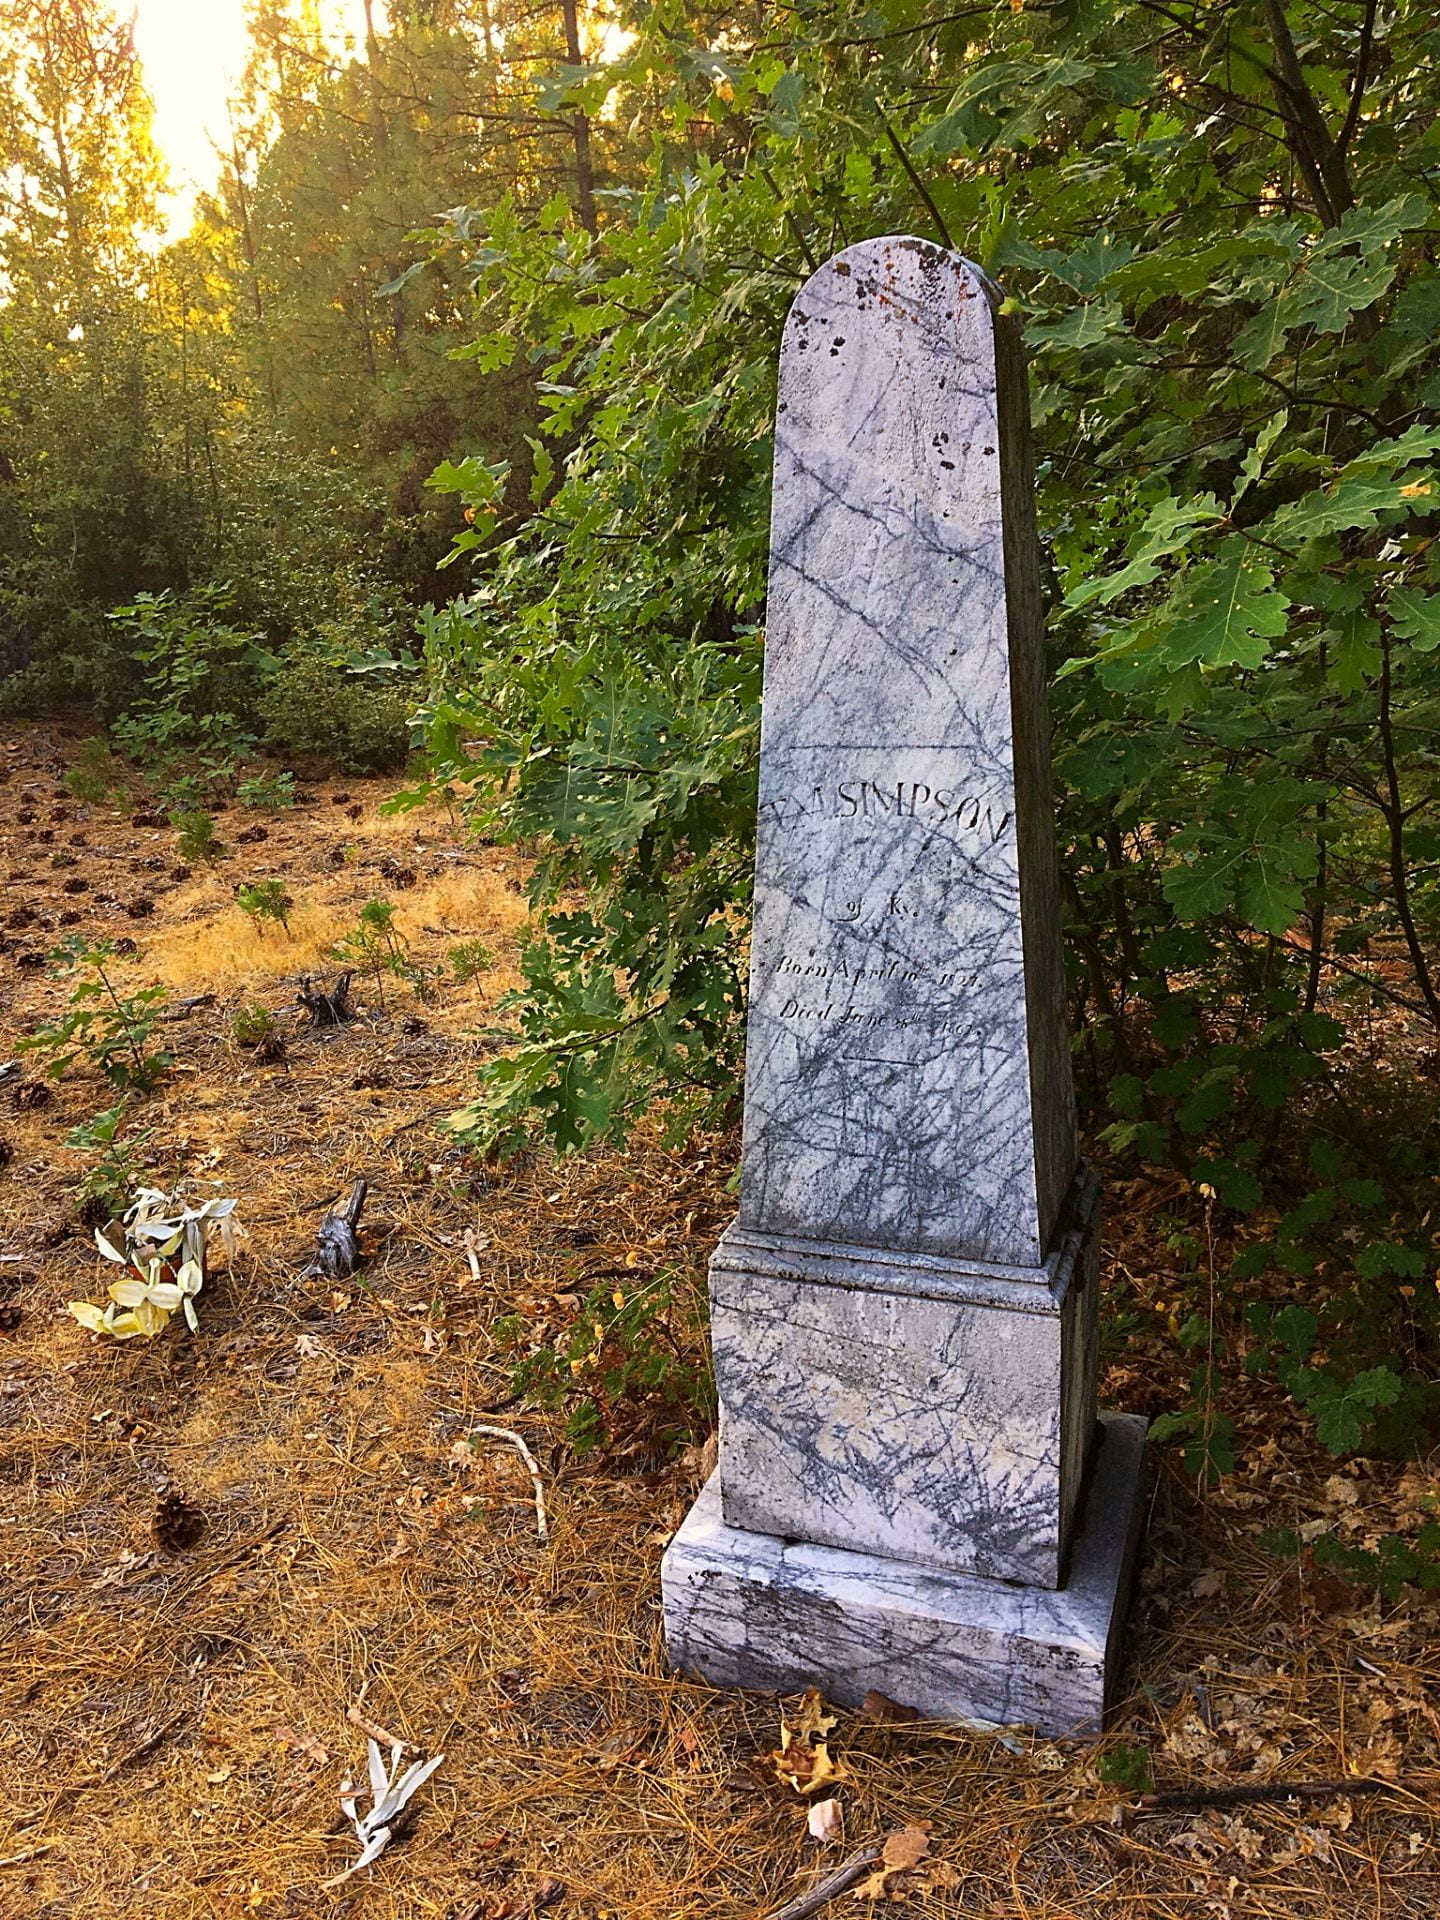
Grave marker for T. M. Simpson, aged 35, died 1862.
The cemetery was located off Indian Diggings Road, a long, dead-end dirt road. Along the drive, I passed the remnants of an old miner’s cabin, still standing but tilted. The area, rich with gold rush history, still showed evidence of dredging, with mounds of soil and large rocks tossed randomly through the woods. A nearby marble quarry, now defunct, supplied some of the material for the monuments. Marble from this quarry was known for the blue veins that ran through the stone. As I neared the end of the road, I briefly caught a glimpse of one of the taller tombstones rising above a narrower pat, which was overgrown with manzanita. I put the car in reverse, drove back and parked. The cemetery showed signs of neglect and was blanketed in pine needles. Faded artificial flowers adorned one gravesite. Like many isolated and historical cemeteries, it was likely vandalized through the years. From later research, I learned of 34 confirmed burials but could only locate 26 engraved headstones. I was able to learn more about the cemetery at findagrave.com.

Old Miner’s Cabin
The video (https://www.youtube.com/watch?v=lGPln56XNVs&t=3s) shown above depicts the cemetery in August 2019.
I was able to learn more at Findagrave.com (http://bit.ly/diggings)
Looking for a fun Google Sheets idea for a group of 6th-graders? How about used cars on a spreadsheet? The idea for this project was prompted by my recent purchase of a used Jeep Grand Cherokee. I did a lot of comparison shopping before making my purchase and knew what features I desired. I used CarGurus to help me shop car lots within a 100-mile radius. CarGurus offers deal ratings. Deals are tagged great, good, fair, high, and overpriced. This lesson asks students to use the following Google Sheets features:
I assigned this lesson to students through GoogleClassroom. I provided them with a link to my example spreadsheet, gave them the link to the cargurus website, and provided them with my video tutorial (https://drive.google.com/file/d/1D6zXx783QvOa4cLMTTKqn74_OXRBjsQM/view), showing them how to use the Snipping Tool to select just the part of the vehicle they wanted to insert into their spreadsheet.
Below is my example spreadsheet, showing the proposed layout with suggested column headers.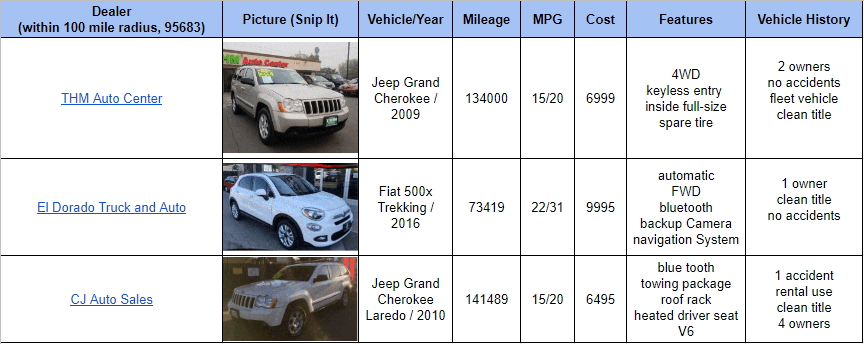
The beauty of a spreadsheet is the ability to compare columns of information side by side.
Students returned a week later to continue with their spreadsheet. They revisited CarGurus to see if their car had dropped in price or if it had sold. Students were encouraged to build a spreadsheet with a minimum of 6 cars. They were instructed to select a few of their favorite features…with one requirement: any car they put on their spreadsheet must have airbags and a clean title. Miles per gallon, expected monthly payment, years financed, and insurance costs would be discussed toward the end of the activity.
Google Drawings and Slides aren’t just for drawings and slide shows. Both can be used to create interactive games: https://www.youtube.com/watch?v=arbSDXlmc9c
Shown below is an example of a Connect 4 game I recently made.
Most of my students had this game built and ready to play by the end of their class period.
The game is initially built in Google Drawings. Students begin with a circle, duplicate it repeatedly, and then click on Arrange on the menu bar to distribute the circles horizontally and evenly. The game board has 42 circles altogether: 7 across, 6 down.
 Once the game board is complete, it is saved as a png file and then uploaded to Google Slides as a background image, which prevents players from accidentally deleting the game board during play. Once in Slides, students create playing pieces for themselves and an opponent. The game is then shared with a friend and play begins. Students can use Ctrl + Alt + M to bring up a comment box to “trash talk” their opponents, letting them know when a move has been made and to let them know who is going to be victorious. The game can be played synchronously or asynchronously.
This game idea game from Alice Keeler. Click this link to read more: https://alicekeeler.com/2017/04/18/google-drawing-play-connect-4-asynchronously
Students new to Scratch Programming can view a number of animated tutorials on Scratch’s website. When a student opens a new project, the tutorials can be seen behind the question mark on the right side of the web page. Clicking the question mark expands the menu.

While animated tutorials are helpful, they’re greatly improved with narration. Take for example the Catch Game. Students are shown how to select an apple and a bowl for their sprites. The apple must be programmed to repeatedly fall randomly from the sky; the bowl must be programmed to move left or right at the bottom of the screen (it will catch the apples). As students follow the tutorial, adding code blocks, the animation will move repeatedly between the apple and the bowl. This leads students to create scripts for the wrong sprite. Close attention to detail requires not only watching the animation but reading the directions. Young programmers are eager to build games – – as quickly as possible. Reading directions is not always a top priority. So, I created this step-by-step tutorial with narration for the Catch Game. In the video, you’ll see me make two errors and then stop and correct myself. Making mistakes requires a redo but in programming it’s called iteration. Teaching kids how to code with an appropriate computer language like Scratch helps them build computational skills. Computational skills include decomposition, pattern recognition, and algorithmic design.
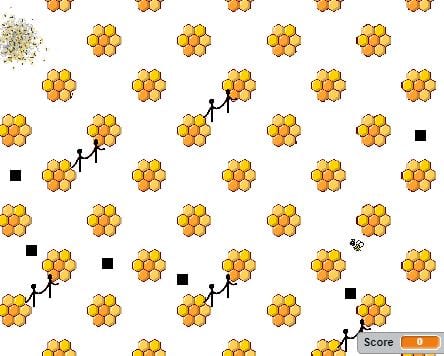
I recently programmed a 4-level game with Scratch. I used a honey bee for the theme. Each level used a unique piece of music designed to create anxiety in the player, making young players–and some older–freak out! Upon closer inspection, each level is not quite so difficult. It took about 70-80 hours to program the game.
Level 1:
Player directs the bee through a honeycomb maze to reach the hive.
Touching a flower along the way earns a point.
Touching a black line makes the bee say “Ouch” and returns the bee to starting position.

Level 2:
Player must move the bee diagonally between the honeycomb-shaped flowers to reach the swarm.
Touching a honeycomb flower or being run over by the moving black squares returns the bee to starting position.
Level 3:
Player must move the bee safely across the highway to reach the pink flower.
If the bee is run over by the moving fly swatter, fly paper, or insect potions, the player blows up and is returned to starting position.
Player can’t let the bee touch any white lines or the perimeter of the background; otherwise, the sound of breaking glass is triggered and returns the player to starting position.

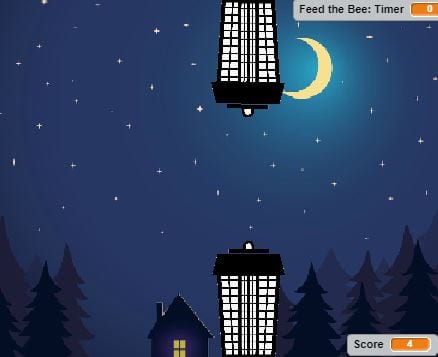
Level 4:
Player must help the bee fly toward the passing objects in the night sky while avoiding contact with the vertically moving insect zappers.
Player has 2 minutes to earn as many points as possible.
This video tutorial shows how the game appears to the player.
Scratch is a simple-to-use free programming language for kids, though also popular with adults. It uses colorfully coded blocks to help young programmers develop an understanding of programming. Users can create interactive projects by simply snapping blocks together. The video shown below demonstrates the steps needed to animate your name.
This tutorial demonstrates the following skills:
–how to title and share your project
-how to select letters, resize, and color them
-how to select a backdrop
-how to troubleshoot letters when they don’t return to their normal position
-how to add sound files
-how to duplicate scripts
 Do you speak Python? I don’t…yet. Is Python something two reptiles speak upon first encounter? No! Python is a high-level computer programming language. High-level means it comes as close as possible to mimicking human language, which–in theory–makes it somewhat easier to learn and apply. Python is used to Program YouTube and DropBox. Python is currently one of the fastest growing computer languages. Introduction to Python programming is most appropriately introduced at the college level, though there could be some early exposure at the high-school level. As a new student to Python, where would I suggest a newby begin? Answer: with an introduction to the hashtag. Hashtags are used to create comments. Comments are used by programmers as a way to create notes about the code they’re writing. Comments can also be read by any coder wanting to read what the original programmer intended for his/her code because it’s not uncommon for code to have errors (bugs) that need correction. With this in mind, please view the video shown here to begin your introduction to Python. The Python interpreter can be downloaded here.
One of the most popular apps in a student’s Drive is Google Slides. Google Slides is much easier and quicker to use than Microsoft’s PowerPoint. While Powerpoint offers many bells and whistles, Google Slides’ more limited selection of features makes it easier for students to focus on what’s important: the message of the slideshow. And, because everything created in GoogleClassroom is automatically saved, it makes finding the project easier for students. The video shown below demonstrates the following skills:

Halloween Art
The videos shown here were created in a snap using the Animoto app. After photographing stacks of kindergarten art, I simply opened the application on my iPhone, selected the photos, a theme, and music. Within minutes, both videos were ready for viewing. I later visited the site on my desktop computer to add our school’s logo and then shared the videos directly to our school’s Facebook account. And, just like that, the Freaky Halloween Faces made their debut.
 Blogging is a great way for students to develop their digital citizenship and writing skills. The subscription-based site, Kidblog, provides kids with a safe platform to publish their writing. Teachers have the option to moderate all posts and comments before publication. I’m currently using this resource with a 2/3 combo and all 3rd and 4th graders.
Many of the skills students practice are the focus of the International Society for Technology in Education (ISTE). ISTE has developed the National Educational Technology Standards (NETS) for students, teachers, administrators, coaches, and computer science teachers. Those standards include the following six focus areas: 1) Creativity and Innovation, 2) Communication and Collaboration, 3) Research and Information Fluency, 4) Critical Thinking, Problem Solving, and Decision Making, 5) Digital Citizenship 6) Technology Operations and Concepts.
Shown below is a sample student post (which is held for review/editing) and guidelines I provide for the students.

Student Post
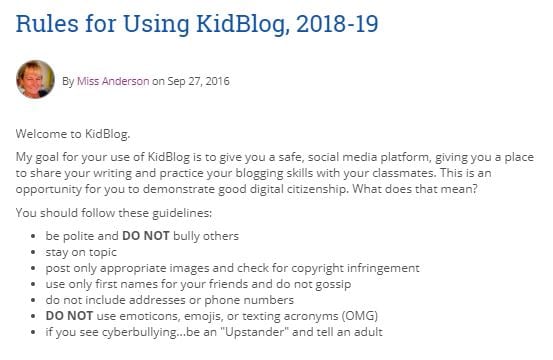
Miss Anderson’s Guidelines
Shown below are some of the skills developed through KidBlog with teacher instruction.
Navigation:
-Use online subscription resources
-Navigate to a web address
Responsible Use:
-Use equipment for positive and productive functions
-Recognize and respect ownership rights (copyright)
Online Safety and Security
-Do not share personal information online
-Do not use inappropriate or disrespectful language online (proper netiquette)
-Do not share network login information
Intellectual Property:
-Explore the appropriate use of copyrighted material through permission, crediting sources, payment
-Discuss plagiarism and its ramifications
Communication Tools:
-Engage in online learning activities (i.e. blogs)
-Use proper netiquette
-Critique email [blog posts and comments] for communication clarity, appropriate operations, and etiquette
In the words of one teacher: “My favorite part about Kidblog is that I can access, assess and respond from anywhere. It’s priceless.”
Some of our CRES 2nd graders have selected a number of topics to include and expand upon in their All About Me graphic organizers at Popplet, which are shown at the bottom of this post. Popplet is a subscription-based program and also helps me create visuals organizers in a snap. Besides Popplet, students can use Google Drawings to create their own graphic organizers.
Listed here are some of the skills developed:
Navigation:
-Navigate to a web address
Responsible Use:
-Use equipment for positive and productive functions
-Recognize and respect ownership rights
Intellectual Property:
-Explore the appropriate use of copyrighted material
Presentation
-Combine text and graphics to create a presentation
-Enter text appropriate to product
The video shown here, explains how to use Drawings to create a timeline.

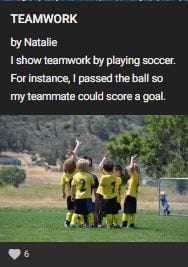
Students in Mrs. Ramatici’s 5th-grade search for appropriate images to add to their Character Day post on Padlet.
Yesterday, September 26th, was Character Day. Throughout the week our CRES kids in grades 4-6 have been posting their comments to the Character Day digital canvas. This project includes the following LEARNING GOALS:
-use proper netiquette
-add attachments to messages
-engage in an online learning tool
-navigate to links
-use two web pages side by side
-compose with correct spelling and grammar
-enter text that is appropriate to the product
-use a teacher-selected subscription resource
-practice NOT SHARING personal information online.
Here’s a sampling of posts devoted to TEAMWORK.


Character Day began in 2014 as a global effort to get people all over the world talking about character. Two years ago, 125 countries and all 50 states participated. This year, Character Day is scheduled for September 26th, and Cosumnes River Elementary is joining the effort for the second year in a row.
Beginning September 24th, students in grades 5-6 will watch one of several videos designed to get them thinking about the kind of person they are and want to be in the world. Then they’ll post their answers onto a digital canvas.
What will you contribute? Watch the video shown below to gather inspiration and reflect.
Watch 1min Character Day Trailer from The Moxie Institute on Vimeo.
After watching both videos, ask yourself:
Now consider joining our class for Character Day, 2018, and post your response to the Padlet shown below, which is organized into columns that reflect the main topics shown in the Periodic Table of Character Strengths. Simply click a PLUS sign under the column you would like to write a reflection. Each column heading shows a variety of subtopics. I’ve written comments under several columns and added photos/links to get things started. Note: all responses are held for moderation before publication so posts won’t appear immediately.
Click the white arrow in the Padlet’s upper right-hand corner to expand the screen to view the digital canvas and participate.