Photo Essay

Compton B photo essay 1 Compton B photo essay 2 Compton B photo essay 3 Compton B photo essay 4 Compton B photo essay 5 Compton B photo essay 6 Compton B photo essay 7 Compton B photo essay 8 Compton B photo essay 9 Compton B photo essay 10


Brad Compton

Mrs. Haynes Period 2

Photography 2

29 September 2014

Leaves of Autumn

            “Autumn is a second spring when every leaf is a flower.” – Albert Camus. Autumn has always been my favorite time of year. As we approach the end of September, we begin to see the first signs of fall. The leaves begin to turn colors, the temperature begins to drop, baseball season begins to end, football season begins, little kids begin to plan their Halloween costumes, and we begin to make plans for the holidays. Leaves are a fascinating part of nature – a natural time clock. As we begin to study the leaves of late September, we notice that there is great variety in their appearance. This is a transitional period between seasons. We feel as if it is still summer, while it is technically autumn.

The first leaf in the documentary is a sign of summer, the tomato leaf. Tomatoes are grown in the summer, and when fall comes around, they usually begin to die. This vibrant, healthy leaf is a sign that although fall is near, summer is still here. My next leaf is from a plant that lives year round, and usually thrives in the spring and fall. The beautiful flowers are not yet in bloom, another sign that fall is not quite here. The next leaf is a patch of clovers, which also grow in the mild temperatures of spring and fall. Clovers, which by many are considered weeds, are actually very beautiful. Their colors bring life to usually desolate areas. They are also a sign of good luck. The next leaf is from a parsley plant. Parsley has a practical purpose in the backyard, while also adding color. Similar to parsley is photo number eight, the basil plant. Basil also is an herb that adds practicality and beauty to the garden.

Now for the more typical leaves, the leaves of trees. Photo number five is an apple tree leaf. Apples usually bring thoughts of fall and harvest; however this is just a sapling. This tree is new, and it has a long life ahead of it. It will experience many more autumns in its future. Photo number six and seven bring back many memories. This tree has always been a focal point of my backyard. The tree has beautiful reddish purple leaves that stay vibrant throughout their lives. Even when the leaves fall, they stay purple and beautiful. Photo number ten is a definite sign of fall. These leaves have already fallen, and they have collected into a pile next to the fence. The leaves are not very colorful, but it is an exciting sign of what is to come. My favorite image, number nine, is a dead apple sapling. The leaves are dead, but at the same time beautiful. They are in the corner of the yard; isolated, away from sunlight and water. The leaves on the sapling would be this color any time of year, however their colors are reminiscent of late fall.

While all of these leaves display the transitional time between summer and fall, they also have a sentimental value to me. These images were all taken in my backyard, the same yard that I grew up in. As I said about photo number six, these leaves from the many trees in my backyard make me think of my childhood. There are pictures of me as a baby, sitting next to the same tree when it was just a few feet tall. In a sense, the trees have grown up with me.

Leaves are nature’s time clock, a natural sign of the changing seasons. Many of us wait for this very special time of year. As you can see from the images in this photo essay, autumn is not completely here just yet. We are beginning to see signs, such as the slight color changes leaves are undergoing, but there are also signs of summer still lingering on.

Abstact and Motion

stopmotion1 stopmotion2 033 abstractblur2

ComptonBabstact1 ComptonBabstract1 OLYMPUS DIGITAL CAMERA

Abstract Photography concentrates on shape, form, color, pattern and texture. The viewer is often unable to see the whole object. The subject of the photo is often only a small part of the idea of the image. Viewers may only know the essence of the image subject or understand it by what is implied.

http://animoto.com/play/vmA1zKWvwHF3sfor3zYCEg

http://animoto.com/play/HLUuEY1EDmjf6sZq1CxVWg

abstract animoto blur animoto

Photo Documentary

Photojournalism is a form of journalism that uses images in order to tell a news story. Photojournalism is different from other photography by complying with a rigid ethical framework which demands that the work is both honest and impartial while telling the story in journalistic form.

The NPPA (National Press Photographers Association) is a professional society that promotes the highest standards in visual journalism, acknowledges concern for every person’s need both to be fully informed about public events and to be recognized as part of the world in which we live.

The NPPA Code of Ethics is a code intended to promote the highest quality in all forms of visual journalism and to strengthen public confidence in the profession. It is also meant to serve as an educational tool both for those who practice and for those who appreciate photojournalism.

The media needs ethics so journalists have a limit; so they know what is right and what is wrong. They need to know when they crossing lines.

Bush-Bullhorn-speech

Studio Project Plan

My inspiration for my studio project is Yousuf Karsh. He is considered to be one of the most famous and accomplished studio photographers of all time. He developed a complicated lighting technique that gives his photographs a very unique feel. Some of my favorite pieces by Karsh are below.


George Bernard Shaw - Portraits by Yousuf Karsh

Fidel Castro - Portraits by Yousuf Karsh

Martin Luther King - Portraits by Yousuf Karsh

Film Developing

The Process

Film Prep:

Developing your film is easy. Remember film is light sensitive. You need to keep it in complete darkness until the end. We’ll begin with the changing bag. If this is your first time – you’ll be working in the changing bag so you won’t be able to actually see what you are doing. I recommend you get some used film on eBay and practice without the bag a few times until you can do it with your eyes closed – or in the bag. Its not hard, but get a feel for it.

It might be also important to note that its very possible you’ll mess up the first time. Don’t get discouraged! Practice a bit first then give it a try. Get some cheap film that you can ruin trying to learn. Its okay.

Once you’ve figured out how to get the film on to the reel. You’re ready to go. Put everything you need into the changing bag. Get your film on the reel and get the reel into the developing canister. Then you’re ready to rock.

Finally I’ll go ahead and put either tap water or distilled water into the can to pre-soak the film. This is optional and not critical. I just do it because its part of my process – do it or don’t. Remember though, stay consistent.

Chemical Prep:

Figure out how much chemical you need to develop. In my cans for 35mm and 120 its about 400ml. Fill 3 measuring cups – one for developer, one for stop, and one for fix.

Fill a large bowl or sink with ice. Place your (filled) measuring cups into the ice and put the thermometer into the developer. You’ll want to get the temperature down to 20C. You’ll get a feel for how long this takes – for me its about 10 min.

Once the chemicals are at 20C you are ready to develop.

Take a look at the Massive Dev Chart for the proper time for your film/developer combination. Its not always right, but its usually really close.

Now we are ready to develop.

Development Bath:

Pour out the water we set before. Then pour in your developer. Then start the timer for the determined time.

We’ll now use a process called agitation. Agitation simply involves “turning” the chemicals to keep them fresh. Its very slow. This will keep the grain down. If you have a closed container, just spin it around slowly. This is enough.

I agitate the film slowly for the first minute. Then I agitate for 10 seconds every minute. I know people who do 5 seconds every 30 seconds. They both work – just stick with one. Remember – we’re trying to be consistent.

When you’ve reached the development time, pour out your developer then pour in the stop bath.

I agitate 10 seconds every minute – 3 minutes total. Pour out the stop.

Pour in the fixer. Depending on what fixer – read the directions. For a standard fixer, I agitate 10 seconds every minute for 10 minutes. After 10 minutes, pour out your fixer.

Your film is now done! You can go ahead and look at it now – its no longer light sensitive.

You’ll need to rinse your film for 15-30 minutes depending on your fixer type.

Final Rinse and Hang

I always do a final rinse with the distilled water. This is important. Your local tap water quality will vary and down her in Dallas there’s lots of “stuff” in the water that will spot the film. To prevent this I agitate in distilled water for 2-3 minutes constantly agitating. You could add a few drops of LFN to lower the water density and prevent spotting. This is optional, but I ALWAYS do that final rinse.

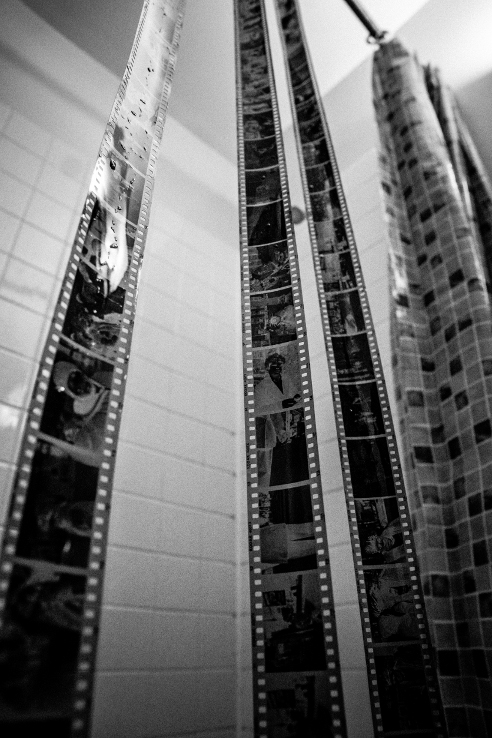
Hang your film with the clips in a bathroom (you should be working in one already up to this point). Why a bathroom? Because showers give off steam which gets the dust out of the air. Its a great, clean environment to develop your film. I hang my film in the shower. It takes about 45min to 1 hour to dry.

Then – still in the bathroom. Cut your negatives with scissors and put them in plastic sleeves. I sleeve them in the bathroom – if you go walk across your house you’ll get dust on the negatives. Its just easier to keep it all as dust free as you can.

http://www.cleanvideosearch.com/media/action/yt/watch?v=Vu0Ul_wsYO8

Photogram

A photogram is a photographic image made without a camera by placing objects directly onto the surface of a light sensitive material such as photographic paper and then exposing it to light.

Adam Fuss

Ethan Jantzer

Tall grass photogram by Ethan Jantzer

Dandelion silhouettes photogram by Ethan Jantzer

Frayed twine photogram by Ethan Jantzer

I was inspired by Ethan Jantzer to do a “naturegram”. My photogram is going to consist of leaves, pine needles, branches, rocks, flowers, and grass.